Wego Engineering
Docs, guidelines and compromising photos
To make changes to these pages, checkout the wego.github.io project and the GitHub Pages docs.
Git flow at Wego
tl;dr
git checkout -b descriptively-named-branch- Push your changes to your branch to GitHub.
- Open a pull request on GitHub from your branch to the
masterbranch. - Ask colleagues for a review and +1s.
- Merge to master, deploy immediately.
Wat
After reading this page, you'll:
- learn how to effectively use git and GitHub to deploy a new feature or bugfix to all of Wego's apps
- uncover why a few elitist jerks in Wego think this is good practice
- learn by example the git commands and GitHub features you'll need to use
How
Ground rules and an overview of the flow:
- The
masterbranch is always deployable. - Nothing gets committed directly to the
masterbranch. Ever. OK, OK we can make exceptions for emergencies. - To work on something new, create a descriptively named branch off of
master(e.g.new-maps-interface). - Commit to that branch locally and regularly push your work to the similarly named branch on GitHub.
- When you think the branch is ready for merging, or you want feedback/help, open a pull request.
- After someone else has reviewed and signed off on the pull request, you can merge it into
master. - Once it is merged and pushed to
master, you should deploy immediately.
#1 - master branch is always deployable
This is a hard rule. The master branch should be stable and is always safe to deploy and create new branches off of. If you push something to master that breaks something, you've broken the social contract of the development team and you should feel pretty bad about it.
Future: We don't have many automated tests, but when we do (post-Project Zero), we can rely on these tests and CI to tell us when things break.
#2 - Nothing gets committed directly to the master branch
This is a soft rule. In cases of emergencies (e.g. www.wego.com is down because of a code error), you are allowed to break this rule. After the emergency is resolved, go back and undo any hacks you've done (following the flow described here).
#3 - To work on something new, create a descriptively named branch
When you want to start work on anything (a new feature, a bugfix, CSS tweaks, anything), you create a descriptively named branch off of the master branch. These are some good examples: iran-country-site, rails4-upgrade, fix-datewise (use hyphens instead of underscores). If there is a JIRA issue tied to the feature or bug, append the JIRA issue key like so: fix-missing-flight-schedules-FLIGHTS-88.
A descriptive name helps a lot because you can easily see what everyone else is working on, and it's fairly easy to know what the branch is all about.
How to do this:
git checkout master- make sure you're on themasterbranch.git pull --rebase- get the latest commits inmaster, if any.git checkout -b descriptively-named-branch- create a descriptively named branch off ofmaster.
#4 - Commit to that branch locally and regularly push your work
Now that you have your local branch, you can start committing to it. Regularly push your work to GitHub so that you have a backup, and people can see what you're working on (maybe they can help out with something).
How to do this:
git push -u origin descriptively-named-branch- push the current branch and set theoriginremote as the upstream.- After setting your upstream, you can simply do
git pushfor future pushes.
#5 - Open a pull request
We're going to use pull requests to send a pull request from one branch to another within a single repository. The pull request then becomes more of a branch conversation where developers can use them to say "I need help", "Please review this" or "Please merge this really cool thing I did over the weekend. Love, Son".
How to do this:
- Let's use homuresu.git as an example. Go to the project page on GitHub: https://github.com/wego/homuresu.
- Click the Pull Request button:
 You should then see something like this:
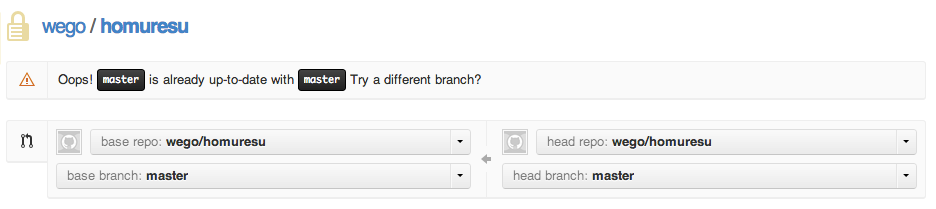
- Find the branch you're working on and select it. Fill in the details of the pull request. Use a descriptive title, and add any useful details of your work in the description (a link to the Jira issue also helps).

- Now that you've created the pull request, it's time to get your work reviewed. Ask other developers to review your work. If you want a review from specific people, cc them in the pull request description or in a comment.
git merge masterwhen required - if your branch has been open for too long and you feel it's getting out of sync withmaster, you can mergemasterinto your topic branch and keep going.
#6 - Merge into master after pull request review
When you feel your work is ready to be merged into master, get it signed off by another developer (or developers - the more the better). Once you have some +1s, you can merge it into master.
Future: Most of our apps don't have tests or CI. When they do, there'll be an additional requirement before you can merge your branch: your pull request's commits should pass CI (we'll probably use Travis since it integrates into GitHub).
#7 - Deploy immediately after review
Finally, your work is done and merged into the master branch. This means that if you don't deploy it now, people will base new work off of it and the next deploy will push it out. Since you really don't want someone else to push something that you wrote that breaks things, you should deploy immediately after merging your work into master so that you can supervise and verify your changes on production.
Why
Our current workflow of regularly committing to master (provided that new commits passed CI) means that we always have code that we can trust as being deployable. By doing this, we enforce and encourage a few things:
- there's always a "safe" branch we can trust as deployable.
- an informal code review process is enforced in the form of signoffs in pull requests.
- requiring signoff for your pull requests means that you're talking to people about your code, and other people are looking at your code. This discourages "ah WTF let me just hack this so I can get #{pointy-haired non-geek} off my back", encourages healthy conversations about code, and spreads knowledge of parts of the codebase to people who otherwise won't be involved.
Attribution
The flow documented here is heavily inspired by Scott Chacon's post on GitHub Flow. Check that out, srsly - it's far more eloquent than the gibberish on this page.